I’m always a bit wary of kids craft kits, as many of you know, and I have to admit that I groaned a bit when I was sent the ‘Pottery Cool’ Clay Studio by SpinMaster to review. My gut reaction was that there was no way a battery powered plastic kids pottery wheel was going enable children to experience the joy and excitement of ‘throwing’ a clay bowl or pot. The girls on the other hand thought it was rather cool looking and promptly pulled all the pieces out to have a look.

Inside The Pottery Cool Kids Pottery Wheel You Get
- A pottery wheel (called Pottery Cool Clay Studio) – requires 4 x C batteries
- spray bottle
- Tool holder pot that has a pattern around it that can be used o the clay
- 4 clay disks
- 1 paintbrush
- 2 sculpting tools
- 2 coring tools (purple tubes)
- 1 plastic cone plus cover sleeve
- 1 plastic cylinder plus cover sleeve
- Instruction book
EXTRA’S YOU MIGHT NEED – cocktail stick, lolly stick or other straight firm edge for smoothing (we used a jam jar scraper), a few different types of paint brushes, plastic straws.

So we set up the Pottery Cool Clay Studio and turned it on and it was at that point I got a little excited… the wheel has a fair bit of power! You can use it in three ways.
- You can put a piece of clay in the middle and try and shape by pushing into the center and then pulling up the sides. We only had a really quick play doing it this was as we wanted to get on and use the plastic forms. You need a ball of clay so can use the clay disk left overs.
- Use the plastic cone to help shape your clay
- Use the plastic cylinder to shape your clay
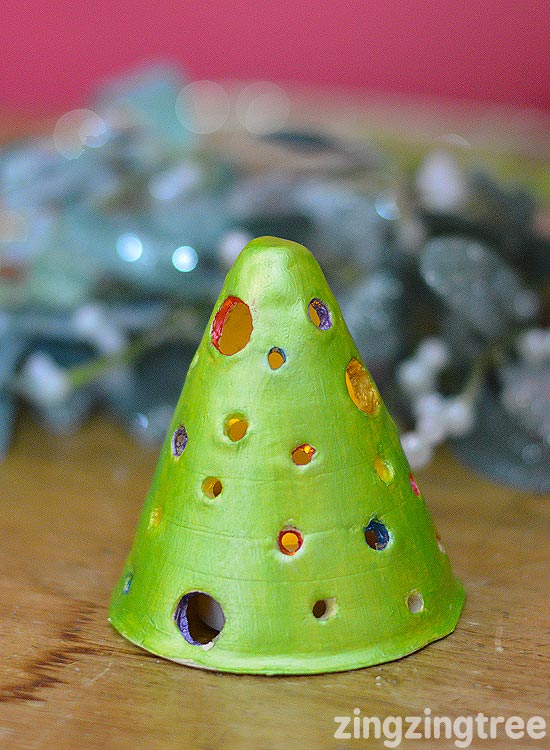
The instructions come with a few projects to help get you started but seeing as we’re heading to Christmas I my eldest (11) to have a go at making a Christmas Luminary . And for that wee needed the cone.
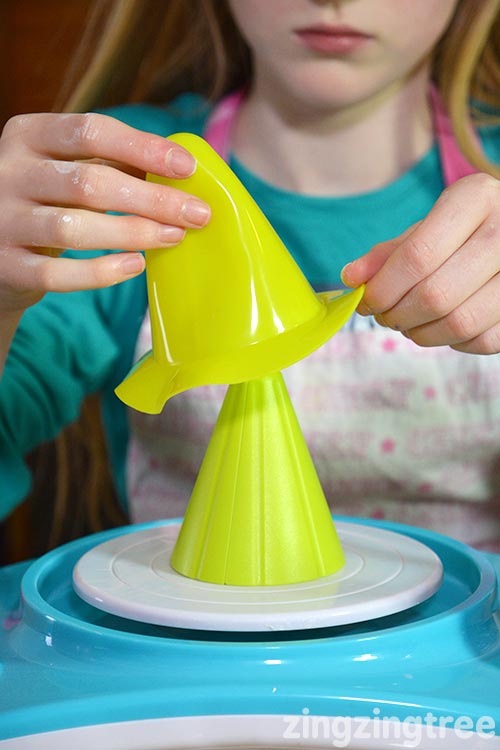
The plastic moulds have four pins that slot into four holes in the top of the pottery wheel. You then place a rubber sleeve over the top of the cone. The sleeve makes getting the clay shape off easier at the end.
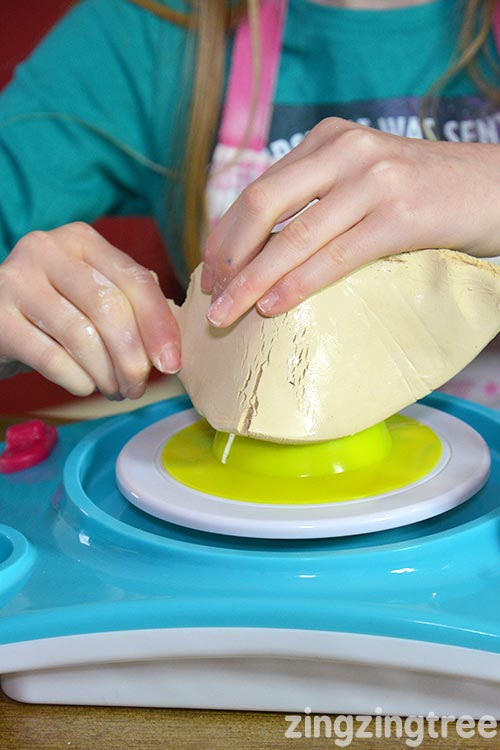
The next stage it to take you clay disc and wrap it around your shape removing excess clay as required. The clay disc is quite thick and cracks when you shape it bit done’t panic as it’s easy to smooth over and if you have any gaps just push a spare bit of clay on. The next time one of my girls use it we’ll roll the clay out and make it a bit thinner.
Once your shape is covered in clay you get to spin! In order for the pottery wheel to work well you must spray a lot of water onto the clay through out the process. You want it to be nice and wet so it slides past your hands so keep spraying (we filled the spray bottle up twice making this). because the clay was thick my eldest had to work the clay up from the base so she could pinch the excess off the top. So using her hands and lots of water she applied pressure and worked the clay. E used the fastest speed for most of the shaping, lowering it to check how things were looking.

Don’t worry about getting a nice smooth surface at this point. Try and feel the thickness if the clay with your hands. the wheel will judder a little if the clay is uneven.
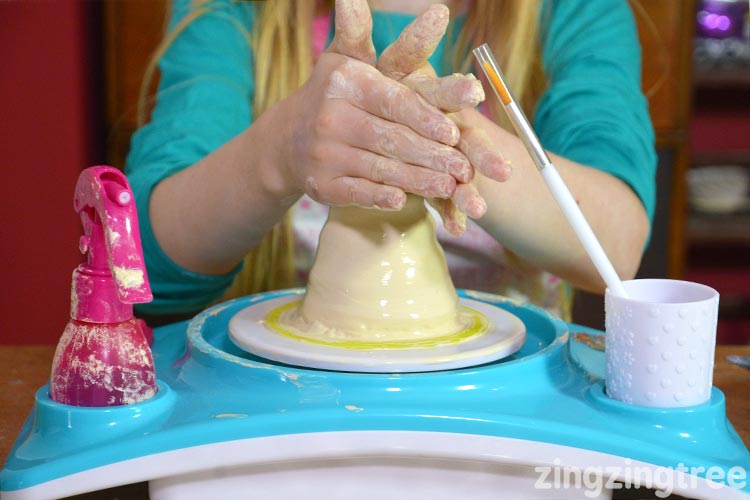
Keep working the clay up and removing it until you are happy with the general shape. Use your fingers to apply the pressure and move the clay up and your palms to smooth it out. Use a cocktail stick to gauge how thick the clay is and then just smooth out the teeny hole it leaves behind.
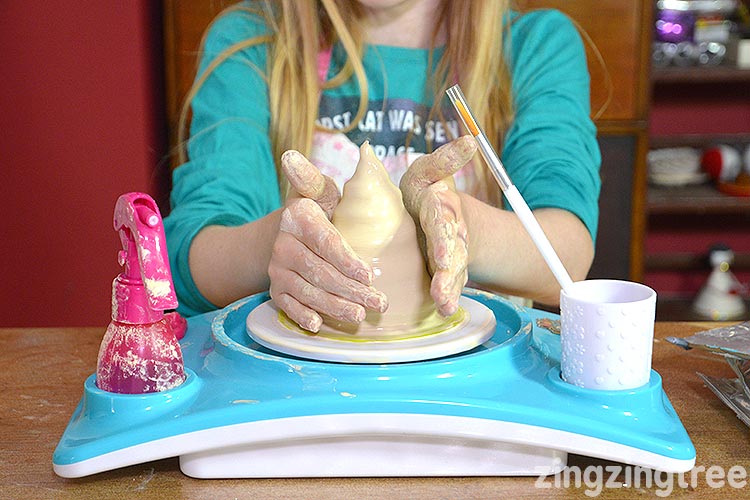
When your happy with your finished shape round off the top.
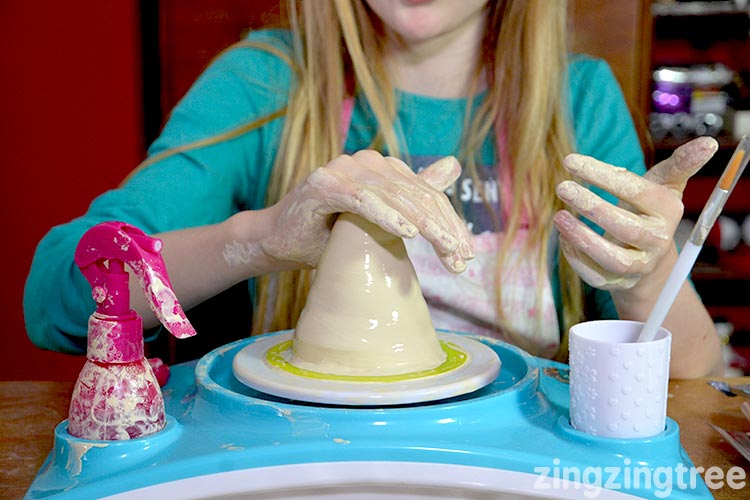
Your shape should be pretty smooth when you’ve finished (don’t forget to keep spraying water) but there will probably be some ‘wobble’ showing.
To make the edges really sharp use a hard edge. Again spray lots of water as this will make it easier to remove the outer layer of clay with your chosen tool. This jam jar scraper worked well but the best tool we found was …
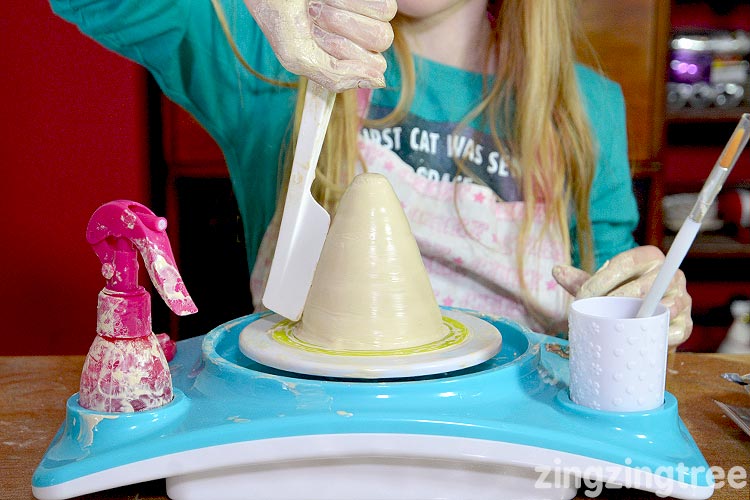
A humble lolly stick. Again use water and pressure to manipulate the clay until you end up with nice straight sides.
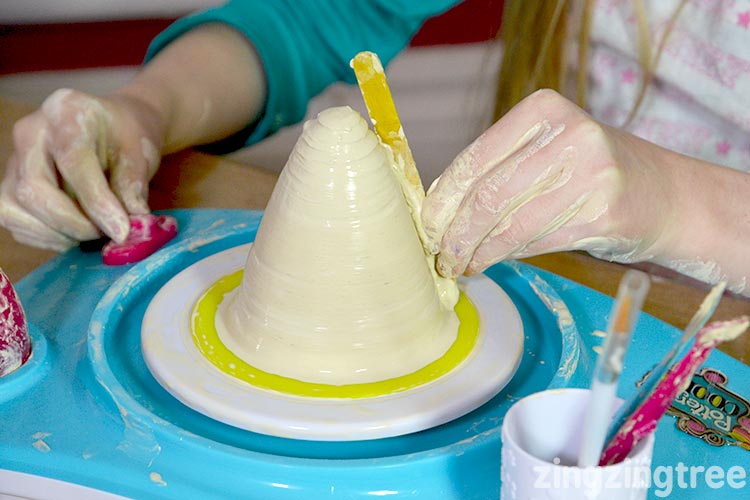
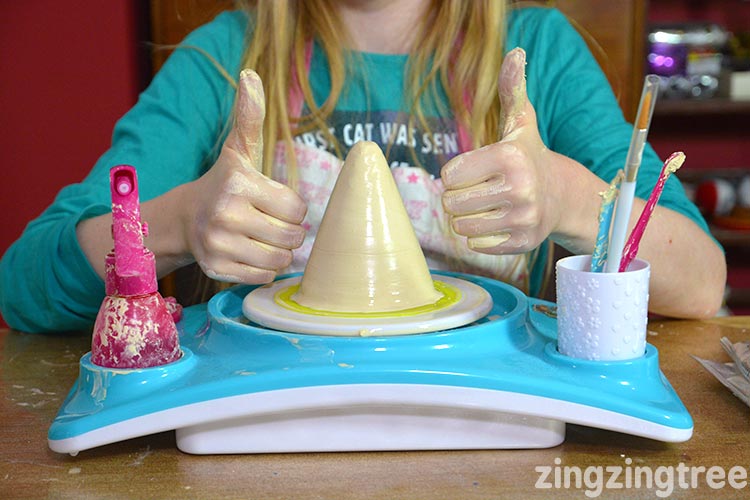
Now use the coring tools and a straw to cut out circles that will allow the tea-light to shine through. You will need to gentle hold the cone on the opposite side as you do this.
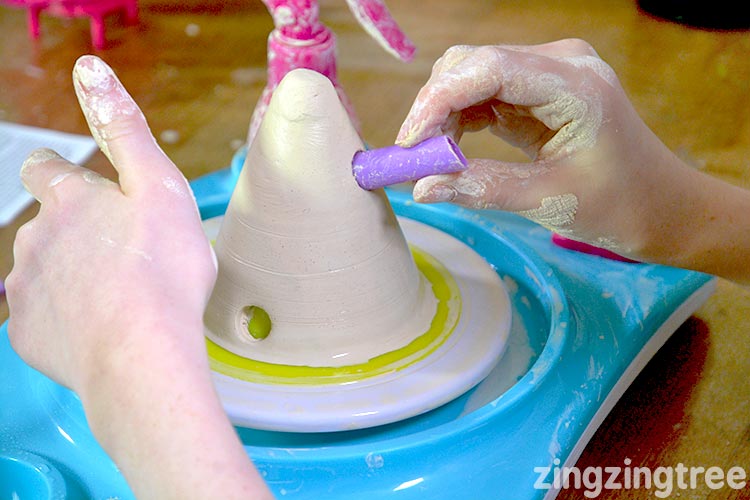
If some of the clay remains use a cocktail stick to gently remove it.
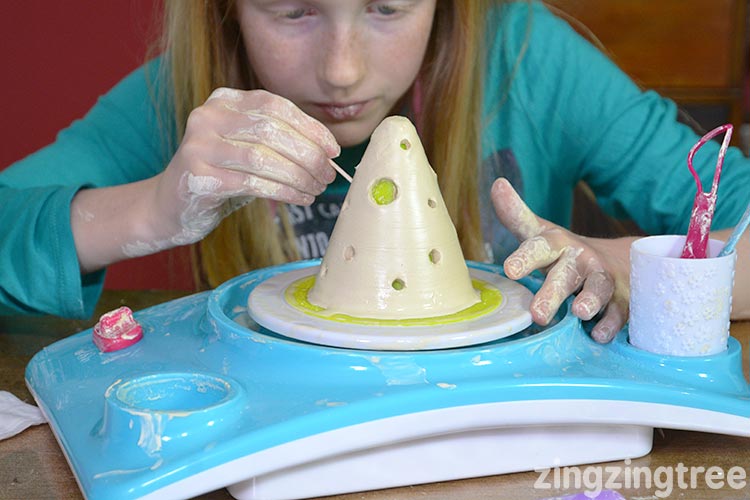
When you have enough holes remove the plastic cone shape from the wheel and put it somewhere to dry a little. The instruction booklet said to lift the sleeve off the shape but I felt that the clay needed to dry a little first so it didn’t loose it’s shape. We put the whole thing on a radiator and left it for about an hour. Then we lifted the sleeve and clay off the shape and returned that to the radiator for about another hour and then we carefully peeled the sleeve off. Rest the clay gently in the palm of your hand whilst doing this.
The following day it was time to paint it and my eldest decided to paint inside the cut out circles so the looked a bit like Christmas baubles.
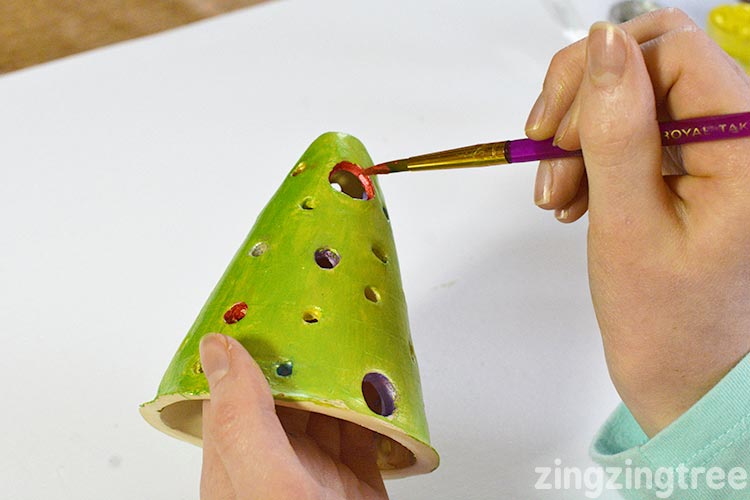
It turns out that the Pottery Cool kids pottery wheel is actually a great little craft gadget for kids. My eldest just loved manipulating the clay on the wheel and would have happily just sat there playing with a lump of clay for a few hours. It’s easy to use straight out of the box and although younger kids might struggle to get a nice slick finish they’ll have loads of fun with the process and will be very proud of their clay masterpieces at the end.
The batteries seem to last well and showed no signs of wearing out during this project. As long as you keep the clay moist the wheel works fine. It’s easy to clean, easy (ish) to use. It’s for aged 6+ which I think is probably fair although of course younger kids will find it harder than the older age bracket. This is not something I would have necessarily have been drawn to if I’d seen it in the shops but having seen my eldest in action I can honestly say the Pottery cool is excellent fun.

This looks fab. I think my little boy would love this for his birthday xx
I love your step by step tutorial, it sounds like you guys had lots of fun.
I have to agree, this probably wouldn’t have been a product that I would have looked twice at in the shops, however with your review and tutorial, it does look like it does a pretty great job. Your daughter’s luminary turned out beautifully.
I would have loved this as a child! It’s a shame my niece is a little too young for this as she would love it as well x
Seeing it being used and unpackaged looks really good. Although my little cousin is a year younger than the recommended age, I’d love to get this for her x
There used to be a pottery club that I was part of in Primary school. I was never any good at it but it was so much fun!
This looks awesome – I was a really creative child so would have loved something like this!
I would feel the same as you initially I usually dread these things but this looks really cool. Gracie would love it!
The bauble idea worked so well and it looks really pretty. I’d have spent hours using this as a kid x
I LOVE the look of this, I love crafts where you can get a bit messy. The finished product looks wonderful and very festive. Jo x
Pottery wheels are such great fun and a great craft, my son would like this 🙂 Brilliant Christmas tree
Now this is very very cool, I am almost jealous I havent got one, I would have loved it as a kid!
Oh wow this is pretty awesome, wishing i had something like this when I was a kid as i did take interest into pottery but then dropped it.
I was wondering what to get my niece for Christmas and she would just love this!
I used to love playing with clay as a kid. This looks like heaps of fun. I’m sure it’ll make a lovely gift this Christmas.
I looked at buying my daughter this for Christmas but I thought she might be a bit young. Maybe next year. x
This looks awesome I’d be worried it would cause lots of mess, but it looks really contained! Great result too!
Amazing creation. This would keep my kids busy.
We have this and my children loved it. Our creations weren’t nearly as polished as yours though!
Wow! Love this step by step tutorial. Sounds so fun. I would love to try this.