Out of all the egg science experiments you can do dissolving egg shells should be at the top of every child’s to-do list. It’s a great visual and tactile STEM project to do at home and there are quite a few things that you can talk about with the kids.

Infact, it should be on every parent’s ‘to-do’ list if you haven’t done it yet!
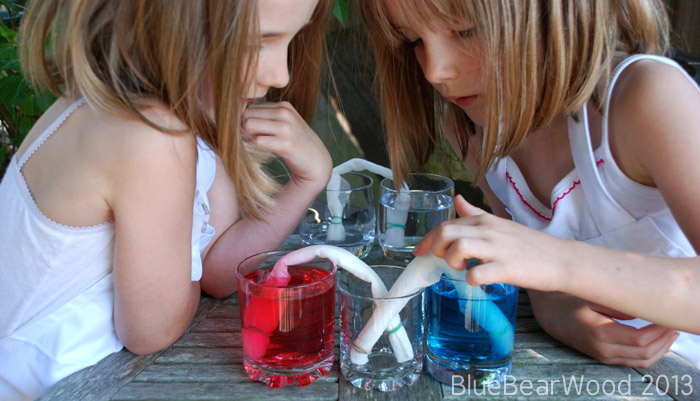
And if you love this then you may like my Water Movement (capillary action) and Measuring Water Beads experiments.

Materials Required
- 2-4 clear glasses
- Water
- White wine vinegar
- Coke
- Orange juice
- Paper towel
- Pencil and Notebook (to write down observations)
Part 1: Dissolving the Eggshell
How To Set Up The Eggshell Experiment
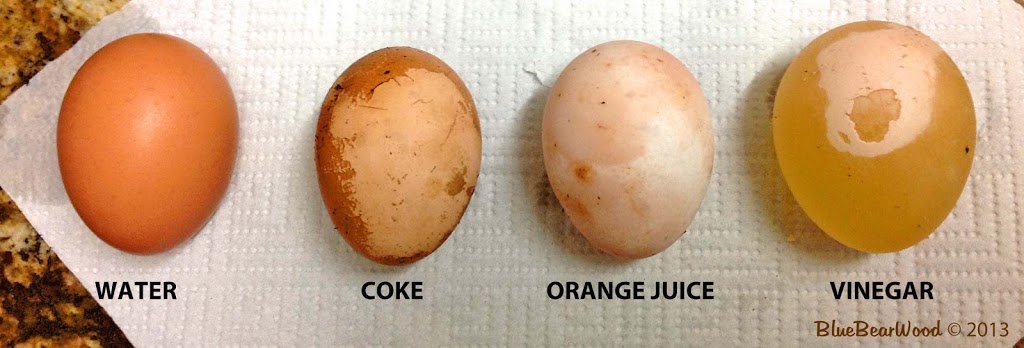
- Gather at least two clear glasses. One will contain vinegar (white vinegar is visually better, but dark vinegar also works), and the other will contain water, which acts as a control substance that will show no change. You could use an empty glass as a control as well.
- If you have additional glasses, use a fizzy drink (e.g., Coke) and fresh fruit juice (e.g., orange juice) to compare results.
- Place eggs of the same size into each glass and cover them with the chosen liquids.
- Observe what happens immediately and record any changes over time.

Dissolving Egg Shell Results
We left the eggs for 24 hrs and when we looked found …
- The water hadn’t done anything
- The coke had surprisingly dissolved very little.
- The orange juice had dissolved quite a bit
- The vinegar had dissolved most of the egg shell off
We put the eggs back in their liquids and left for a further 12 hours and found …
- The water still hadn’t done anything
- The coke had dissolved a little bit more.
- The orange juice had dissolved quite a bit more
- The vinegar had dissolved all of the eggshell

The Science Behind Dissolving an Eggshell
Eggshells are made of calcium carbonate. When the egg is placed in vinegar, a chemical reaction will occur straight away in the form of lots of little bubbles.

This chemical reaction occurs between the acetic acid in the vinegar and the calcium carbonate in the shell, producing carbon dioxide gas. Over time, the shell dissolves completely, leaving only the egg’s membrane.

Part 2: Membrane Osmosis
Membrane Egg Science Experiment
Once all the eggs were out of their liquid it was time for some observations
You will notice that the egg with no eggshell is A LOT bigger than the control eggshell. This is because the membrane surrounding the egg is semi-permeable, allowing liquid to pass through osmosis.
- Whilst the egg was in the vinegar, liquid passed through the semi-permeable membrane into the egg, causing it to swell as the volume inside increased. This process, known as osmosis, occurs because the vinegar solution has a higher concentration of water compared to the inside of the egg, prompting water molecules to move inward to balance the concentration.
- When the egg is placed on a paper towel, water begins to move back out through the membrane, causing moisture to seep onto the towel. This demonstrates how the semi-permeable membrane allows water molecules to move in both directions depending on the surrounding environment.
- If you gently pick up the egg and hold it in your hands you will notice it feels damp again as water continues to move through the membrane, making it possible to feel the process happening in real time.
For older students, this is a great introduction to the biological processes of osmosis and diffusion.
Part 3: Bouncing Egg Science Experiment
The Bouncing Egg Test
Now for the fun part! The shell-less egg is elastic and bouncy due to its swollen membrane which is due to the extra fluid.
How high will it bounce?
- Cut pieces of wool to different lengths (e.g., 10cm, 20cm, 30cm) to use as height markers.
- Drop the egg gently from different heights and observe when it breaks.
- Examine the contents carefully and identify the egg white, egg yolk, and any liquid absorbed during the experiment.
- Note how the membrane behaves when the egg breaks.
- Discuss why the membrane eventually bursts.
More Fun Egg Science Experiments
If you enjoyed this, check out these other fantastic egg-themed science experiments:
- Sink or Float Science with Easter Eggs – A great buoyancy experiment!
- E is for Eggsperiment – More creative ways to explore egg science!
OMG- they are mini-yous!
lol, everyone says that. We all have the same haircut at the moment!
I think that we bounced ours at the 24 hour mark so they were still robust enough to bounce about 30 cm? We had one egg and all three of us bounced it successfully.
Ours were a week old. We’re going to do it again and bounce fresh ones. I also want to see if we can colour them by putting them in coloured water.
egg-celent! 🙂 Definitely want to try this out. thanks for sharing on G+-Reshama
We love eggs 🙂
The girls are so cute. I love it when the eggs break and they weren’t expecting it! 😀
Love these, and thanks for linking up to our challenge.
Do you have to use brown eggs or white ones
It doesn’t matter which ones you use. It’s easier to see the shell dissolving on brown inside the liquid but white will still work.
Do you use raw eggs or hard boil them??
Hi Donna, You use raw eggs for this
And the raw vinegar egg didn’t burst when you bounced it? I would be afraid these eggs would bust when handled considering how much of the shells are dissolved!
The membrane is pretty strong although it will degenerate over time or if bounced from a height (watch the video)
i really like this project i could proberly (i already know i spelt it wrong) do this every day.
How do you make a graph and table from this experiment?
It depends what your trying to capture … so you could do
time v. % shell dissolved or membrane showing for each egg/ liquid (line diagram
liquid v. % shell dissolved (bar graph)
A table would be better as you could also mention colour change assuming you had the same coloured eggs in each liquid
I have a question , did you use organic eggs or normal eggs
Standard eggs
Use this for science fair, this is cool, hope to get a good grade:)
Oh we loved watching this experiement so much. We – my 4 boys aged 4 – 13 yrs – laughed so much…just like ‘school’ at ours.
We did the experiment to, but I accidentally dropped the egg in the sink and it burst so we never got to test the bouncing which the boys were dissapointed by.
Thanks for sharing.
Sounds like you had great fun doing it even if you didn’t get to bounce it … a good excuse to have another go. It’s one of our favourite and I’ve got another version set up to do over Christmas!
What would like the question be would it be what liquid dissolves,expands,and makes eggs bouncy?
You have a few questions to ask … What liquid dissolves egg shells and why? What makes an egg increase in size when it looses its hard outer shell? How do you make an egg bounce?
After the shell dissolves put it in cornsyrup! More water in the egg than in the cornsyrup so due to osmosis water will travel out of the egg . The cornsyrup will become thinner anf the white of the egg will shrivel and you will be able to feel the yolk. Then we put it in colored water to waych it grow again!
Did you boil them
no, I used uncooked/raw eggs. You could boil them but you wouldn’t be able to see the membrane or bounce them afterwards
How would you adapt this for a special needs child? Do you keep the jars in the fridge overnight?
It would depend what the special needs are? Can you be more specific? And no, you just leave it all out in the open 🙂
We did this with boiled egg and shell got dissolved and the inner membrane on the egg peeled off like rubber band
What a great experience for our preschoolers. Thanks for the great learning!
i love this web site it helps me so much for my experiment and i am in 7th grade
Love this experiment! Can’t wait to try!!
I saw you used brown eggs. Could I use white eggs to show the staining? My daughter wants to do an experiment dealing with tooth decay. I am debating on which set of eggs to use…brown (natural) eggs or white shelled eggs.
Thank you!!!
Hi, to show staining you need to use eggs that have a white shell. The white eggs will show the subtleties of the staining and you could also then clean half of the egg with toothpaste to show why its important to clean your teeth 🙂
What is the controlled variable for this experiment? Would it be the water?
Would there be any issues with putting it in a plastic container that has a lid for transporting it? I work in a library and would love to do this as my STEAM project for Feb., but I would need to make sure they have a lid to place on the container to take it home. Would the chemical reaction inside interact negatively with the lid/lack of oxygen? Thanks!
Putting a lid over it will not stop the reaction as the reaction is between the vinegar and the eggshell 🙂