Looking for a fun ant craft for kids? In this step-by-step tutorial, we’re making a detailed 3D ant model using polystyrene shapes, sand texture and pipe cleaner legs.
This creative insect craft is perfect for school projects, minibeast topics and learning about a colony of ants in a hands-on way.

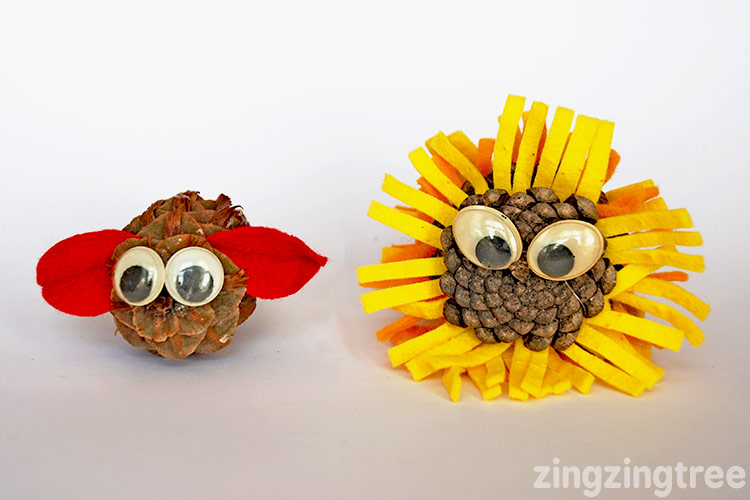
If you love this then do have a look at my previous #CreativeNounCrafts craft where I made an adorable You May also like the following animal crafts that include some Pine Cone Pets, Woodland Animals, and this Bask Of Crocodiles.


What Is a Group of Ants Called?
A group of ants can be called a colony, army, swarm or nest.

A colony contains different types of ants (known as castes), each with a specific job. These include:
- Queen
- Worker
- Soldier
- Princess
- Drone
Ants are incredibly strong and adaptable insects. They live almost everywhere in the world — the only places indigenous ants haven’t been found are Antarctica and a few remote islands.

This 3D ant craft is a great way to explore insect anatomy while creating something fun and tactile. Ants are invertebrates (meaning they have an exoskeleton rather than bones). Like all insects, they have:
- Three body parts (head, thorax and abdomen)
- Six jointed legs
- Elbowed antennae

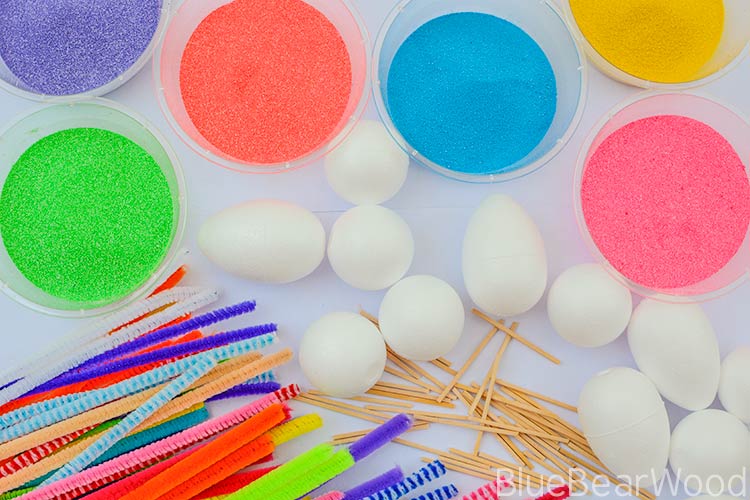
Materials Needed for Your 3D Ant Craft
- 4cm polystyrene balls,
- 5cm polystyrene eggs,
- coloured craft sand,
- 30cm pipe cleaners,
- PVA glue,
- craft match sticks,
- scissors,
- googly eyes,
- crescent moon confetti,
- paintbrushes,
- sharp pointed object (cocktail stick, sharpened pencil, nail, large needle etc)
How To Make Your Ant Craft Body
For each ant, you will need:
- One polystyrene egg (abdomen)
- Two polystyrene balls (head and thorax)
Step 1: Create the Body Structure
- Carefully make a small hole in the polystyrene egg using your sharp tool.

- Cut the craft matchsticks into halves or thirds.


- Dip one end of a stick piece into glue and insert it into the polystyrene egg (abdomen), leaving half of it sticking out
- Next, dip the exposed stick end into glue and attach it to one of the balls (thorax). You will need to poke a small hole into the ball first. Leave for a few minutes until the glue becomes tacky and starts to set.

- Make another hole in the thorax at roughly a 45-degree angle for the head.

- Glue a stick into the remaining ball (head) and attach it to the thorax.

Allow the structure to dry fully before moving on. This step is important — the joins need to be firm before you add glue and sand.
How To Decorate Your Ant Model
When dry it’s time to cover in sand. You want to do each segment of the body seperately. I start with the abdomen (egg shape), then the head and finally the thorax.

So, starting with the abdomen, use a paintbrush to cover the polystyrene evenly in glue. Sand isn’t very forgiving and will show lumps and bumps plus if there is too much glue you will find you get run marks when it dries. Take care not to get the glue on eny of the other segments. You can use a damp cloth to wipe away any spillage.

Pour the sand over the glued area. I put the sand in a pot and have a clean sheet of paper underneath to catch it on.

Carefully repeat the above steps for the head. If you get any whit showing through wait until it has dried before carefully touching up to fill the gaps or you will end up dislodging even more sand! The glue and sand is quite fragile and easily marked so watch out for nails. Younger kids may want to wait until the two end have dried (radiators are great for this) before sanding the middle.
Make a hole in the middle side of the thorax area and place either a crafts stick or cocktail stick in there to act as a handle to hold the ant so you can paint glue onto the last area. This hole will house one of the pipe cleaner legs when it’s dry.

Holding the stick paint the glue carefully on and cover in sand. Now leave it to dry.
Cut your 30cm pipe cleaners into three equal lengths (10cm) until you have six legs.
Using your sharp tool make three holes along each side of the thorax area.

Push your pipe cleaners in and bend them into shape.

Make two more holes in the top of the head where you want your antenae. Cut 5cm lengths of pipe cleaner for short antenna and 10 cm lengths for large ones … push them into the holes.

Finally add your googy eyes and a smiley face.

Do search the tag #CollectiveNounCrafts on social media to find the other Collective Noun Crafts in the series or follow the blog trail.
Powol Packets has a super cute Pod Of Dolphins you can make.

These are so cute and any excuse to crack the glitter out I love it!!
These are so cute and pretty simple to make , great craft idea for a rainy day.
oh these are too cute – definitely making these with the girls!
These have to be the cutest (and happiest!) ants I’ve ever seen, and I love the bright colours too!
Omg these are so cute and look pretty funky too. Very innovative and love the bright colours 🙂 x
I am so bad at doing crafts but I enjoyed reading this post and seeing the ants come to life (so to speak)
Oh these are adorable, we definitely need to try and them during half term, the children would love them.
Oh my gosh these are completely fabulous – so cute, my kids would love making these!
This looks like a really fun craft to make. Perfect for midterm or even a rainy weekend.
These really are the cutest ants I’ve ever seen! I’ve pinned the post so Oscar and I can have a go at making them at the weekend 🙂
Louise x
This is such a cute idea! I should do this with my niece. xx
Definitely would want to keep these! What a fun and creative activity!
Super cute!! Thanks for sharing!!!